VoIP Setup
At the time of writing the entire VoIP Code and Setup has been completely rewritten in order to improve on stability and scalability. Setting up VoIP requires a bit of initial work.
The following document is based on the setup of the official instance and works pretty flawless once setup.
TIP
If you use linux and want to run DCTS on a "proper" server you could install and use Plesk on your server to have an easier time with managing sub domains and reverse proxy setups. Personally i'd recommend it as i dont wanna manually deal with config files etc. Keep in mind plesk is not free tho. This is a personal recommendation.
NOTE
Its easier to use two subdomains in total where one is used for DCTS itself and the other is used for LiveKit. Checkout DNS Setup.
LiveKit Service Config Setup
TIP
LiveKit installation instructions can be found on their website. Generally it comes down to the following:
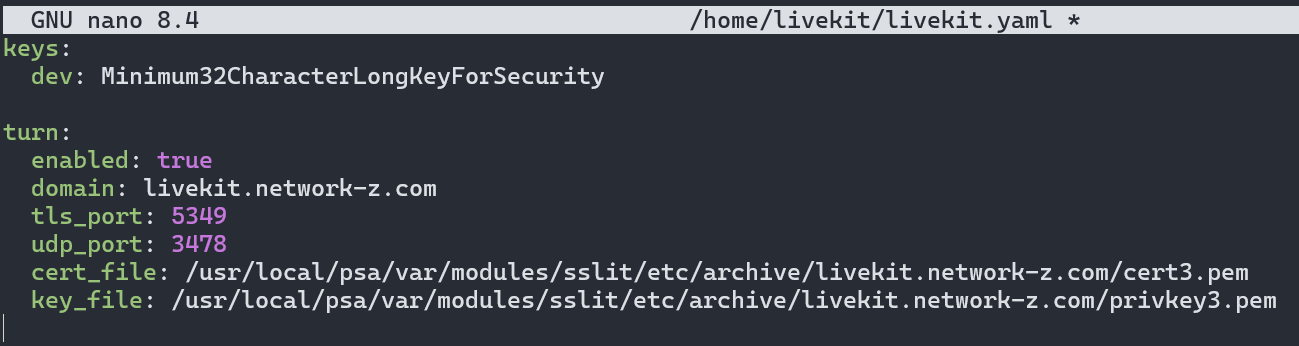
curl -sSL https://get.livekit.io | bashAfter you have installed LiveKit you should find a livekit config file inside the DCTS folder in /livekit/livekit.yaml that looks like the screenshot below when setup correctly.
Its important that you set enabled to true, and change the domain value to the domain you're using and linking the TLS certificate files. Infos for how to setup the domain can be found in DNS Setup. After you've setup the config file you can exit your editor of choice and start livekit with the following flag:
livekit-server --config /home/dcts/livekit/livekit.yamlNOTE
The secret for livekit needs to be a string with a minimum length of 32 characters! Consider using something like random.org
An example path where caddy TLS certs may be stored can be found in Caddy Setup.
NOTE
Turn and TLS is required if you want others to be able to connect to VoIP. Its used for both talking and screensharing.
The key shown at line 2 can be changed freely and needs to match with the livekit settings inside the configs/config.json file.
TIP
You can try and find errors by viewing the livekit log using sudo journalctl -u livekit -f. Both the desktop and web client will show logs inside the Web Dev Console (CTRL + Shift + i).
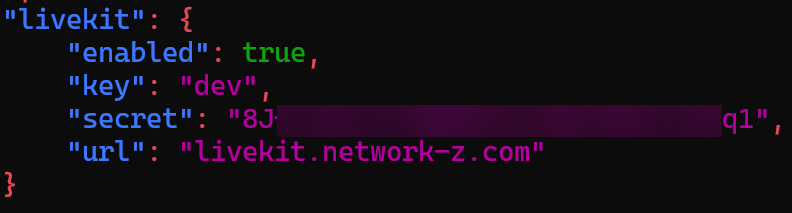
LiveKit DCTS Config Setup
Inside the config.json file in found in the configs/, you will find a section for livekit. This is where you set it to enabled and enter the other relevant data found inside the livekit.yaml file from the previous step. Once everything is set VoIP and Screensharing should work flawlessly now.
WARNING
Before editing anything inside the config file manually, makes sure to stop the server/livekit, as your changes may get lost.
Also make sure that the /livekit/livekit.yaml and /configs/config.json settings for livekit are matching up.
LiveKit Reverse Proxy Setup
You can find the example proxy configs for livekit in [[network/Reverse Proxy Setup|Reverse Proxy Setup]].
TIP
You can verify if livekit works by entering your subdomain in a browser and check if you'll see OK like in the screenshot below, given you've already installed livekit and its running.
